Popular Posts

Wednesday, December 26, 2012

Starch In My Dress Shirts

Found in vegetables like potatoes and corn, starch is a very versatile substance.
Anyone who has dropped off dress shirts at the Dry Cleaners like Comet Cleaners in Denton Texas knows a little bit about starch. They know there's the option of no starch, light starch, medium starch, heavy starch and extra heavy starch (Cowboy Starch). What kind of starch do you choose? There are both pros and cons to starching clothing, and not all clothing will react to being starched in the same way.
What is it?
Starch is a carbohydrate produced by all green plants as a source of energy. It is used in the Dry Cleaning industry as a stiffener for fabrics. There are three different types of starch that are used in a commercial laundry; corn starch, wheat starch, and synthetic starch.
Corn Starchzoom Corn Starch is a natural starch derived from the endosperm of the corn kernel. It's fine texture in powder form make a paste when mixed with water. This natural 'glue' sticks to the fibers of your shirt offering resistance against wrinkles when worn. It is a water soluble starch and will eventually wash out of your shirts. The drawback of corn starch is that the particles are rather small and a large percentage of starch added to the clothing is rinsed away in the rinse cycle.
 Wheat Starch Wheat starch is also a natural starch that has a "glue-like" consistency. It is the starch of choice for most commercial cleaners who use natural starch since it sticks to fibers better than corn starch. Since the particles are larger microscopically, they are able to be caught and entwined in the fibers of the shirt with less being wasted in the rinse cycle.
 starch sources Synthetic Starch, also known as poly vinyl chloride or PVC is basically a plastic polymer. The particles are larger, like wheat, so they stick well to the fibers and less rinses away. During pressing of the shirt, heat is applied to the fabric which melts the PVC and bonds it semi-permanently to the fibers. This encases the fibers with a layer of plastic and keeps the individual fibers extremely rigid. This is fantastic for a crisp looking shirt that resists wrinkles well. It does wash out over time. Synthetic starches can also be made from a combination of difference natural starches with added plasticizers.
Here at Comet Cleaners in Denton Texas, we use the finest combination of natural and synthetic ingredients in our starch to make your shirt perfect every time. By combining, we are able to reap the benefits of both. Our starch features the consistency of natural starches with the staying power of synthetics.
Why Use it?
Starch is added in different amounts to different types of fabrics. Slight variances in fabric content, size of the individual strands, and even the type of weave can have an effect on how a particular shirt looks and feels after being starched. There are pros and cons to starch usage:
Pros:
  • Leaves a crisp, clean appearance to dress shirts
  • Makes ironing easier
  • Helps resist stains
Cons:
  • Some may find starched clothing itchy and scratchy
  • May reduce the lifespan of clothing by stiffening fibers. When fibers come into contact with anything else, they offer more resistance and can fray or break.
Tips:
  1. Know what type of starch is currently being used on your clothes.
  2. Do not over starch shirts if you intend to keep them in usable condition for a while.
  3. Starch of any kind will coat the individual strands of a shirt. Dark shirts do not respond well to starches and will begin to develop a "shine" if overly saturated.
If you have any questions regarding starch, take your shirts to a Professional Dry Cleaners.

Tuesday, December 11, 2012

Care and Cleaning of a Christmas Tree Skirt


Cleaning a Christmas Tree Skirt, regardless of the fabric composition, is a tricky process.  If done improperly, it can result in disaster.  The Professional Dry Cleaners here at Comet Cleaners in Denton Texas have been cleaning Christmas Tree Skirts for over ten years and have perfected methods based on what it's made of.  Felt cannot be cleaned the same way as silk, cotton cannot be laundered if it's on a skirt with embroidery thread, etc...  For the best possible results, we recommend taking all tree skirts to a Professional Dry Cleaners.
Common tree skirt stains include:
  • Dirt, Dust
  • Sap
  • Animal messes
  • Water Spots
As all materials are treated differently, there is no one way to clean a tree skirt.  We NEVER suggest cleaning one yourself. If you insist on trying, be sure to test out anything on a hidden area to avoid completely ruining the skirt.
Things to note:
  • Felt is prone to shrinking and fading and must be handled carefully.
  • Dyes are rich in tree skirts.  They can easily bleed onto other fabrics.
  • Never attempt to clean a tree skirt that is lying on carpet.  The dye leakage could result in a permanent stain on your carpet.
  • Do not agitate or rub
  • Do not attempt to clean if there are both dark and light colors, like red and white.
  • Always follow the care label.  Most will say Dry Clean Only.  If there is no care label, err on the side of caution and take it to a Professional Dry Cleaners who holds a Certification in Dry Cleaning and a Certification in Wet Cleaning.  This ensures that any cleaning will be properly handled.
  • If you have pets, check you're skirt often. Animals seem to love using tree skirts as potties. 

We know all kitties love Christmas, but when they potty on a tree skirt it's time to pause the festivities and deal with the stain.  The ammonia in urine can cause the dyes of the fabric to run and stain anything underneath.  You also face the tree skirt itself being ruined.  Should you notice a spot, take to your dry cleaners immediately.


Tuesday, December 4, 2012

How To Remove Mold Smells and Stains From Clothes

Everyone at some point has left clothes in the washer for too long, or left smelly, sweaty stuff in a gym bag for a few days.  When this happens you may find yourself with mold stained clothes. Mold can and does occur often, no matter how careful you are. A wet and warm environment as well as stagnant air is a breeding ground for mold and bacteria. If you find yourself dealing with a moldy situation, all is not lost. It's time to gather up some common household supplies and get to work restoring your clothes to their former, mold-free, fabulous selves.

Things you'll need:

  1. Lemon

  2. Salt

  3. Water

  4. Sponge

  5. Perborate bleach

  6. Chlorine bleach

  7. Laundry Soap


1 Take the moldy clothing outside and shake it lightly to remove any surface mold. Avoid doing this indoors so that your living space is not infected with the airborne mold spores which can cause allergies and illness.  Make every effort to avoid breathing in the spores and if it's a breezy day, be sure the mold doesn't fly back in your face.  If the clothing has molded in the washer, run a cleaning cycle with bleach and no clothes to kill any mold that may still be in the washer. 
 2 Hand wash each item, one at a time, using lukewarm water and a laundry detergent. You may also choose to wash it in a washing machine, but do not add other clothing so that the mold doesn't spread to other clothing. Follow the garment care instructions on the clothing label by using the correct water temperature and detergent for the specific garment. 
 3 Lay the garment outside in a sunny spot to dry, rather than drying in a dryer. The sun will lighten any mold stains and can entirely remove minor staining.  Keep in mind that the sun has a bleaching effect on clothing, so this may not be the best method if it's dark clothing that is affected. 
 4 Apply lemon juice over the stain and cover with a layer of salt, if the sun alone did not remove the stain. Place the clothing back into the sun once you have treated it with lemon and salt so that it can dry, while the lemon, salt and sun remove the stain.  Again, do this only if the clothing is lighter in color.  The acidity of the lemon may also cause a slight bleaching of colors.  If you're unsure, test in an inconspicuous area first.
 5 Mix together perborate bleach and water, using a tablespoon of bleach to a pint of lukewarm water, according to the University of Georgia. Check the garment label to determine whether you should use lukewarm water or if the garment can handle hot water. Use a sponge to dab the bleach solution onto the mold stain and then rinse out. If the garment is delicate, test on an inconspicuous area before treating the stain.
 6 Soak the stain with a mixture of chlorine bleach and water as a last resort, if the stain persists. Mix together 1 or 2 tbsp. chlorine bleach in a quart of water and apply it to the stain with a sponge. Let the chlorine bleach work on the fabric for five to ten minutes before rinsing.  The combo of the lemon juice and bleach should remove any moldy or sour smells from the clothing.

Tips:

  • If your garment is very delicate, dark, or especially meaningful to you, take it to a Professional Dry Cleaner and allow them to remove the mold and stain.

  • Some people are sensitive to mold, so you may wish to cover your eyes and hands with protective eye wear and gloves while removing mold.


Dry Cleaning Equipment  

On Site Cleaning = Access To Professional Dry Cleaning Management

At Comet Cleaners we do our dry cleaning and laundry on site. We have trained specialist in stain, mold and spot removal.


Monday, November 19, 2012

How to Remove Stains from Unfinished Wood


If you’ve had the misfortune of finding unwanted stains on your unfinished wood, you’ve learned firsthand why experts recommend a protective coat over wood surfaces. Whether you’ll ever be able to remove the stain depends on a couple of factors, namely, the type and condition of the wood and the kind of stain you’re dealing with, but under the best of circumstances many stains will be permanent. Still, you may improve or eradicate the stain by following these steps.


You Will Need:


  • Fine grit sandpaper

Steps to Remove the Stain:


  1. Using fine grit sandpaper, lightly sand the surface.
  2. Pause frequently to wipe away the dust and check your progress.Also, ensure you are not sanding so much wood away that you leave a depression.
  3. Repeat until the stain is gone or until you start to wear away the wood.
  4. If the sanding is noticeable, lightly scuff the rest of the surface with the sandpaper so it matches.

Additional Tips and Advice:


  • Pine is a soft wood and quickly absorbs stains. Harder woods are more likely to only be stained at the surface, therefore increasing your chance of successful stain removal.
  • If you get the stain out, consider finishing the wood with a clear protective finish. If you can’t get the stain out, consider applying a wood stain over the entire surface to “hide” the unwanted color.
  • Oily food stains rarely come out of wood.

Monday, November 12, 2012

How do you remove olive oil from a wool sweater?


You recently splashed some olive oil and lemon juice mixture on a wool sweater. How can you get that out? You haven't done anything yet except blot as much as you could. 

Removing stains from wool can be a little tricky to tackle yourself. It’s often best to take it to a professional cleaner and allow them to treat the stains. If you want to remove them at home, here is a method that many have found safe and effective. If your item is machine washable, see the additional tips for a quicker cleaning option.

You Will Need:


Cornstarch
Mild bleach-free dish detergent (ex: Dawn or Ivory)
Tub or basin
Cold water
Large sheet of paper
Pencil or pen
Large absorbent bath towel


Steps to Remove the Oil Stains:


1. If the oil stain is minor, you may be able to remove it with a simple absorbent.
2. Cover the stained area with cornstarch.
3. Allow it to set for 30 minutes so the cornstarch can absorb the oil.
4. Brush clean with a clean, white cloth.
5. If the stain remains, you can repeat the above steps or wash the oil out with the following steps.
6. Start by laying the sweater on the large sheet of paper.
7. Trace around it with the pen/pencil. This will provide a template to lay the sweater back out to

     its original shape and size while it dries.
8. Fill a tub, sink or basin (depending on the size of the item being washed) with cool to cold water.
9. Add a few drops of bleach-free dish detergent. If the stain is really tough, try applying some

    detergent directly to the stain.
10. Agitate the water lightly to mix.
11. Immerse the sweater in the water.
12. Swish it around gently a few times to work the soap and water into the sweater. Do not

       wring, twist or pull on the sweater or it will lose its shape.
13. Let the sweater sit in the water for 2-3 minutes and allow the soap to work.
14. Remove the sweater carefully being careful not to pull any parts and drain the soapy water.
15. Refill with clean water
16. Place the sweater back in the clean water to rinse.
17. Remove the sweater and drain the water.
18. Repeat steps 10-12 until all of the soap is removed.
19. Once rinsed, lay the sweater on a large, absorbent towel.
20. Roll the towel up with the sweater inside.
21. Gently push the water out of the sweater.
22. Repeat until the sweater is damp.
23. Lay the sweater on top of the paper with the outline traced onto it.
24. Make sure it fits the original size and shape. Make adjustments as needed as the sweater dries.
25. Allow the sweater to air dry completely.


Additional Tips and Advice

Some wool sweaters are machine washable (check the care instructions on the tag), which will make the stain removal process much simpler. In these cases, you will be able to spot clean the stain and machine wash the entire sweater. Do not machine dry it, as the heat will cause shrinkage. Wool is natural hair, and some have found basic shampoo effective in removing oil and grease stains. Never use any products with bleach to clean wool. It will weaken the fibers.

Saturday, November 3, 2012

How to Clean a Keurig Coffee Maker With Vinegar and a Toothbrush Melissa Maker @ Clean My Space shares a quick and easy method of cleaning your expensive Keurig coffee makers with a toothbrush, vinegar, dish soap, and a microfiber cloth. Most of the machine can be cleaned in your dishwasher, with minimal manual labor involved.  Head on over to Clean my Space for the full instructions, along with a how-to-video.


Wednesday, October 24, 2012

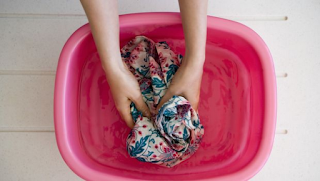
Is Cleaning by Hand Washing The Same as Machine Washing on Delicate?


Can you clean a garment that is hand wash only on the Delicate Cycle in a washing machine?  You could, but should you?  Definitely not.  If in doubt, bring your item to a Professional Dry Cleaners like Comet Cleaners in Denton, Texas for our expert treatment.


It has long been a myth that hand washing and machine washing on a delicate cycle were the same thing when, in fact, they are very different. Sure, many people have taken the risk of machine washing a garment and had it be a success, but just as many have failed.

Hand washing properly is a process that uses as little agitation as possible.  The cleaning that is done is primarily from gentle soap action or water. Machine washing primarily uses agitation. Agitation is when clothes rub against other clothes creating a friction or scrubbing effect that gets dirt and grime out.
 

Clothes who's care labels state that hand washing is the only acceptable cleaning methods are usually too delicate to handle this scrubbing action.


Here's Why: Machine washing can cause tearing of fibers on a microscopic level which can cause holes and warping to develop. Even if it's not initially evident, these tiny tears can manifest months later as a hole that you have no clue how it got there.


Here are a few tips on hand washing your clothes:
  • Try to always use cold water, not longer than lukewarm if you have to.
  • Make sure the sink is clean, or better yet have a tub used only for hand washing.
  • If there is a stain, pre-treat with a gentle soap and rub lightly with a finger.  Submerge in the water to rinse, repeat as needed.
  • If the item is extremely dirty it is better to let it soak overnight than risk over working the fabric.
  • If washing more than one piece, only wash like colors at the same time.  If the items are different colors, wash one at a time using fresh water between color changes.
Most hand wash only garments will be delicate and expensive fabrics. Keep these treasures in the best possible shape by following the care labels exactly.  If you are determined to use the delicate cycle in your washing machine, placing the garment in a net bag will help minimize damage.  
Better yet, bring them to us at one of our three locations Comet Cleaners of Denton, Texas.   We hand wash fine garments all the time!


Wednesday, October 17, 2012


Karen asks: We have vinyl tile in our bathroom. A family member struggles with incontinence at times, and there is a dark brown stain around the toilet. I think if may be due to urine/feces being on the floor. Is there any way to remove the stain without damaging the tile? The rest of the floor is fine; it’s this one area that is the problem.

You Will Need

Rubber Gloves
Paper Towels
Broom
Vinegar, 1 cup
1 Gallon bucket
Liquid Dish Washing Detergent, 2 tsp.
Warm Water
Long Spoon
Brush with soft bristles
Abrasive Sponge
Multiple Washcloths
Rubbing Alcohol
Baking Soda


Steps

Wearing the rubber gloves, pick up any excess urine and feces with the paper towels
and dispose of properly. The gloves will help to protect against bacteria.


Sweep the area with the broom to rid it of any excess dirt and dust. This will
ensure you have the most direct access to any stains.


Mix together the cup of vinegar, the dish washing detergent, and warm water in a
bucket. Stir with the long spoon, and be careful not to create too many suds.


Dip the soft bristled brush into the mixture, and scrub the stain. Then, rinse with
clean water. If there is still a stain, use the more abrasive method described next.


Mix equal parts water and baking soda to create a paste. Spread the paste over the
stained area and allow to set for 10 to 15 minutes.


Scrub with the abrasive sponge, then wipe clean with a dry cloth.

Finally, scrub the area with a clean cloth soaked in rubbing alcohol.


Additional Tips and Advice

Remove the stain as soon as possible, as letting it sit for too long may ruin your floor.
Just for the sake of clarity, never mix bleach and vinegar. Using bleach on your floor
is OK, but be sure to NOT add vinegar, as it will create a chlorine gas

Monday, October 8, 2012

Why Do Shirts Lose Their Buttons At The Shirt Laundry?


Does someone at the dry cleaners go around smashing buttons on all the shirts they clean...or is there another reason shirts come home without buttons?


It's not exactly a question for the ages, but it's certainly one that puzzles many Dry Cleaning regulars.  Like many of life's great mysteries, this particular mystery has several answers.

Why do shirts lose buttons?
First of all, buttons fall off clothing all the time, not just at the shirt laundry. For example, I find that whenever I buy a dress shirt from a certain retailer, I lose buttons the first or second time I wear the shirt and mumble under my breath that I'll never shop there again as I sew the button back on. These manufacturers simply don't sew buttons on very well. I also lose buttons over time as the thread wears down or I catch my shirt on something.

But it is true that the shirt laundry does cause buttons to break, crack or come off. This happens for a couple of reasons. First, shirt presses press the entire placket of the shirt at once, including the buttons. The presses have pads to soften and protect the buttons, but button loss can still occur. Also, if a dry cleaner doesn't change these pads regularly, they become hard and are more likely to break or damage buttons. The pressing step of the shirt laundry could also exacerbate already damaged thread, being the straw that breaks the camel's back.


The standard machine used to press the collars and cuffs of dress shirts:

  • The peachy pads act as shock absorbers and help protect buttons as long as the pads are changed often. 
  • The top metal part comes straight down on a hinge and applies heat to the cuffs and collars giving them a sharp, crisp finish. 
  • Occasionally buttons are already cracked or weakened from age or from the cleaning process and the button comes off.  A reputable Dry Cleaners will check for missing buttons and replace them.
 Substandard thread in the manufacturing process is also a factor in the missing buttons epidemic.  Here at Comet Cleaners of Denton, we check each shirt individually and replace each missing button for free.  This isn't just for dress shirts either, but we also hand inspect every pair of pants, every ladies blouse, etc... 

Reputable dry cleaners will replace for free any buttons broken, cracked or lost during the shirt laundry process. We know lost buttons happen and we do what we can to prevent this loss. But as in life, a little rain will fall and you will lose buttons off your dress shirts at the shirt laundry.

Now to tackle another of life's great mysteries — how to pick the winning lottery number.

Monday, October 1, 2012

How to remove Masking Tape From Clothes


How To Remove Masking Tape From Clothes


Sharon asks: I found a sweat  suit with masking wrap around the outfit that had been taped together for organizing a garage  sale. It has been in a storage tub for several years. When I took the tape off, it left white marks where the tape had been. How do I remove the marks?

Removing tape residue from a table or other hard surface can be difficult enough, let alone an article of clothing. Since you can’t safely scrape off the residue on a piece of clothing with a razor, other options are required. Hopefully, with these tips, you will be able to get that sticky mess off of your clothing easily and without damaging your clothes.


You Will Need


  1. WD40
  2. Paper Towels (dry)
  3. Iron
  4. Cleaning Cloths


Steps


  1. Spray the affected area of the clothing with a very light layer of WD40, and allow to soak in. Approximately 10 minutes should be sufficient.
  2. Plug in the iron and set it to low. This can be done while the WD40 soaks in.
  3. Take a paper towel and wipe the area off. Be sure to do this gently.
  4. Place a paper towel over any remaining residue on the fabric.
  5. Run the heated iron over the fabric and paper towel with the paper towel side up. This will cause the residue to melt and stick to the paper towel, freeing your clothing from it.
  6. With another clean paper towel or cleaning cloth, wipe the area. Then wash as usual.

Monday, September 24, 2012

How Often Should I Dry Clean My Leather Jacket?


How Often Should I Dry Clean My Leather Jacket?
Posted by Mark Kerr, Denton, TX, Sept 24, 2012


Rain or Shine, Leather Jackets are Fine!


A leather jacket is a very versatile piece of outerwear. Depending on the rest of your outfit, you can look tough and edgy or classic and simple. Leather is a material that can look ravishing on both men and women of any age. If you own a genuine leather jacket, then you also know it can easily be one of the most expensive articles of clothing you own.

The great thing about leather jackets are that, as long as they are high quality and maintained well, they can last for years...for decades.  However, one concern that many leather jacket owners have is not knowing how often or how to clean their leather jacket. When it comes to proper leather cleaning, it’s best to trust this care to Professional Leather Cleaners in Denton, Texas.

There is no magic number of times you should clean your leather jacket, but it is important to take it to the Best Professional Leather Cleaners in Denton, Texas whenever it becomes soiled to prevent permanent damage. While there are many leather cleaning solutions available, it’s not always a good idea to attempt to clean your prized jacket yourself. In fact, there are numerous different types of leathers and leather treatments, and trying to clean your jacket without the help of Professional Leather Cleaners in Denton, Texas could result in expensive damage.

Here are some tips for caring for your leather jackets (or any leather garment) at home:

  -  When your leather gets wet, be sure to let it dry out thoroughly before hanging in you your closet

   - Never try to dry your leather near a source of heat, especially near an open flame like a fireplace or floor
      furnace

   - If you leather gets dirty from dust, mud, food or wine, wipe if off with a damp cloth ASAP and allow it to
      dry

    - If you spill a more harsh substance on your leather, like gasoline, oil or other chemicals, wipe it off and
       take it to a professional leather cleaner ASAP. Be sure to tell the leather cleaner exactly what
       happened  to it.

    Get your leather cleaned and conditioned every year...more often if worn frequently and exposed to harsh conditions. My suggestion is to always clean your leather at the end of the season before putting it away until the fall. It will be in great shape when the cold weather rolls in again.

In order to ensure your leather jacket stays pristine for many years, take it to the Professionals. Here at Comet Cleaners in Denton, Texas, we know how to keep your leather jacket in top shape. Contact Us now to get a quote!


Cleaning Leather Is An Annual Affair...Don't Leave It To Next Year

Trust Your Leather Cleaning To The Pros Comet Cleaners in Denton, TX at 507 W. University Dr.
Denton, Texas 76205  940.381.1182

Friday, September 14, 2012

Welcome to our new blog. I am Mark Kerr, owner and operator of Comet Cleaners in Denton, TX 76201.  My wife Malinda and I have been in the Dry Cleaning business for 23+ years.  We've lived in Denton since 1999.  Our businness is locatedat 507 West University Drive.  That's on the south west corner of University and Carroll Blvd.  Across the street from Kroger just down from the Pizza Inn facing Carroll Blvd.  We'll be updating this from time to time with info on our services, our efforts to use green, Eco-friendly, supplies and services as well as tips on cleaning or preserving your treasured garments at home.

Thanks

Mark